10 - Implement Azure Functions (5 min)
In this walkthrough, we will create a Function App to display a Hello message when there is an HTTP request.
Task 1: Create a Function app
In this task, we will create a Function app.
-
Sign in to the Azure portal.
-
In the Search bar at the top of the portal, search for and select Function App and then, from the Function App blade, click + Create.
-
Select the Consumption Hosting Plan.
-
On the Basic tab of the Function App blade, specify the following settings (replace xxxx in the name of the function with letters and digits such that the name is globally unique and leave all other settings with their default values):
Settings Value Subscription Keep default supplied Resource group Click on Create new
Name: 10-functionFunction App name function-xxxx Runtime stack Powershell Core Version 7.4 Region East US 2 Note - Remember to change the xxxx so that it makes a unique Function App name
-
Click Review + Create and, after successful validation, click Create to begin provisioning and deploying your new Azure Function App.
-
Wait for the notification that the resource has been created.
-
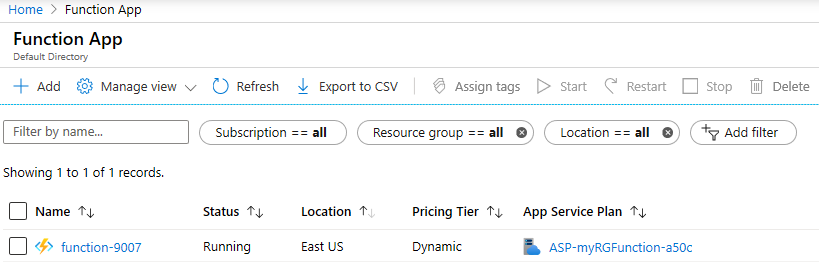
When the deployment has completed, click Go to resource from the deployment blade. Alternatively, navigate back to the Function App blade, click Refresh and verify that the newly created function app has the Running status.
Task 2: Create a HTTP triggered function and test
In this task, we will use the Webhook + API function to display a message when there is an HTTP request.
-
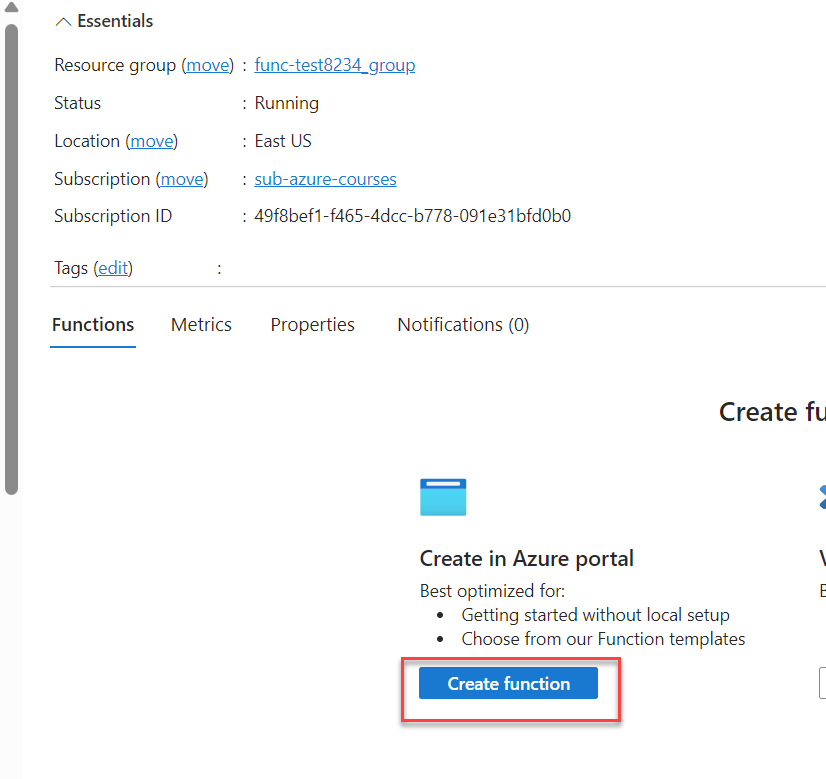
On the Function App blade, click the newly created function app.
-
On the function app overview, Functions Tab click on Create in Azure Portal
-
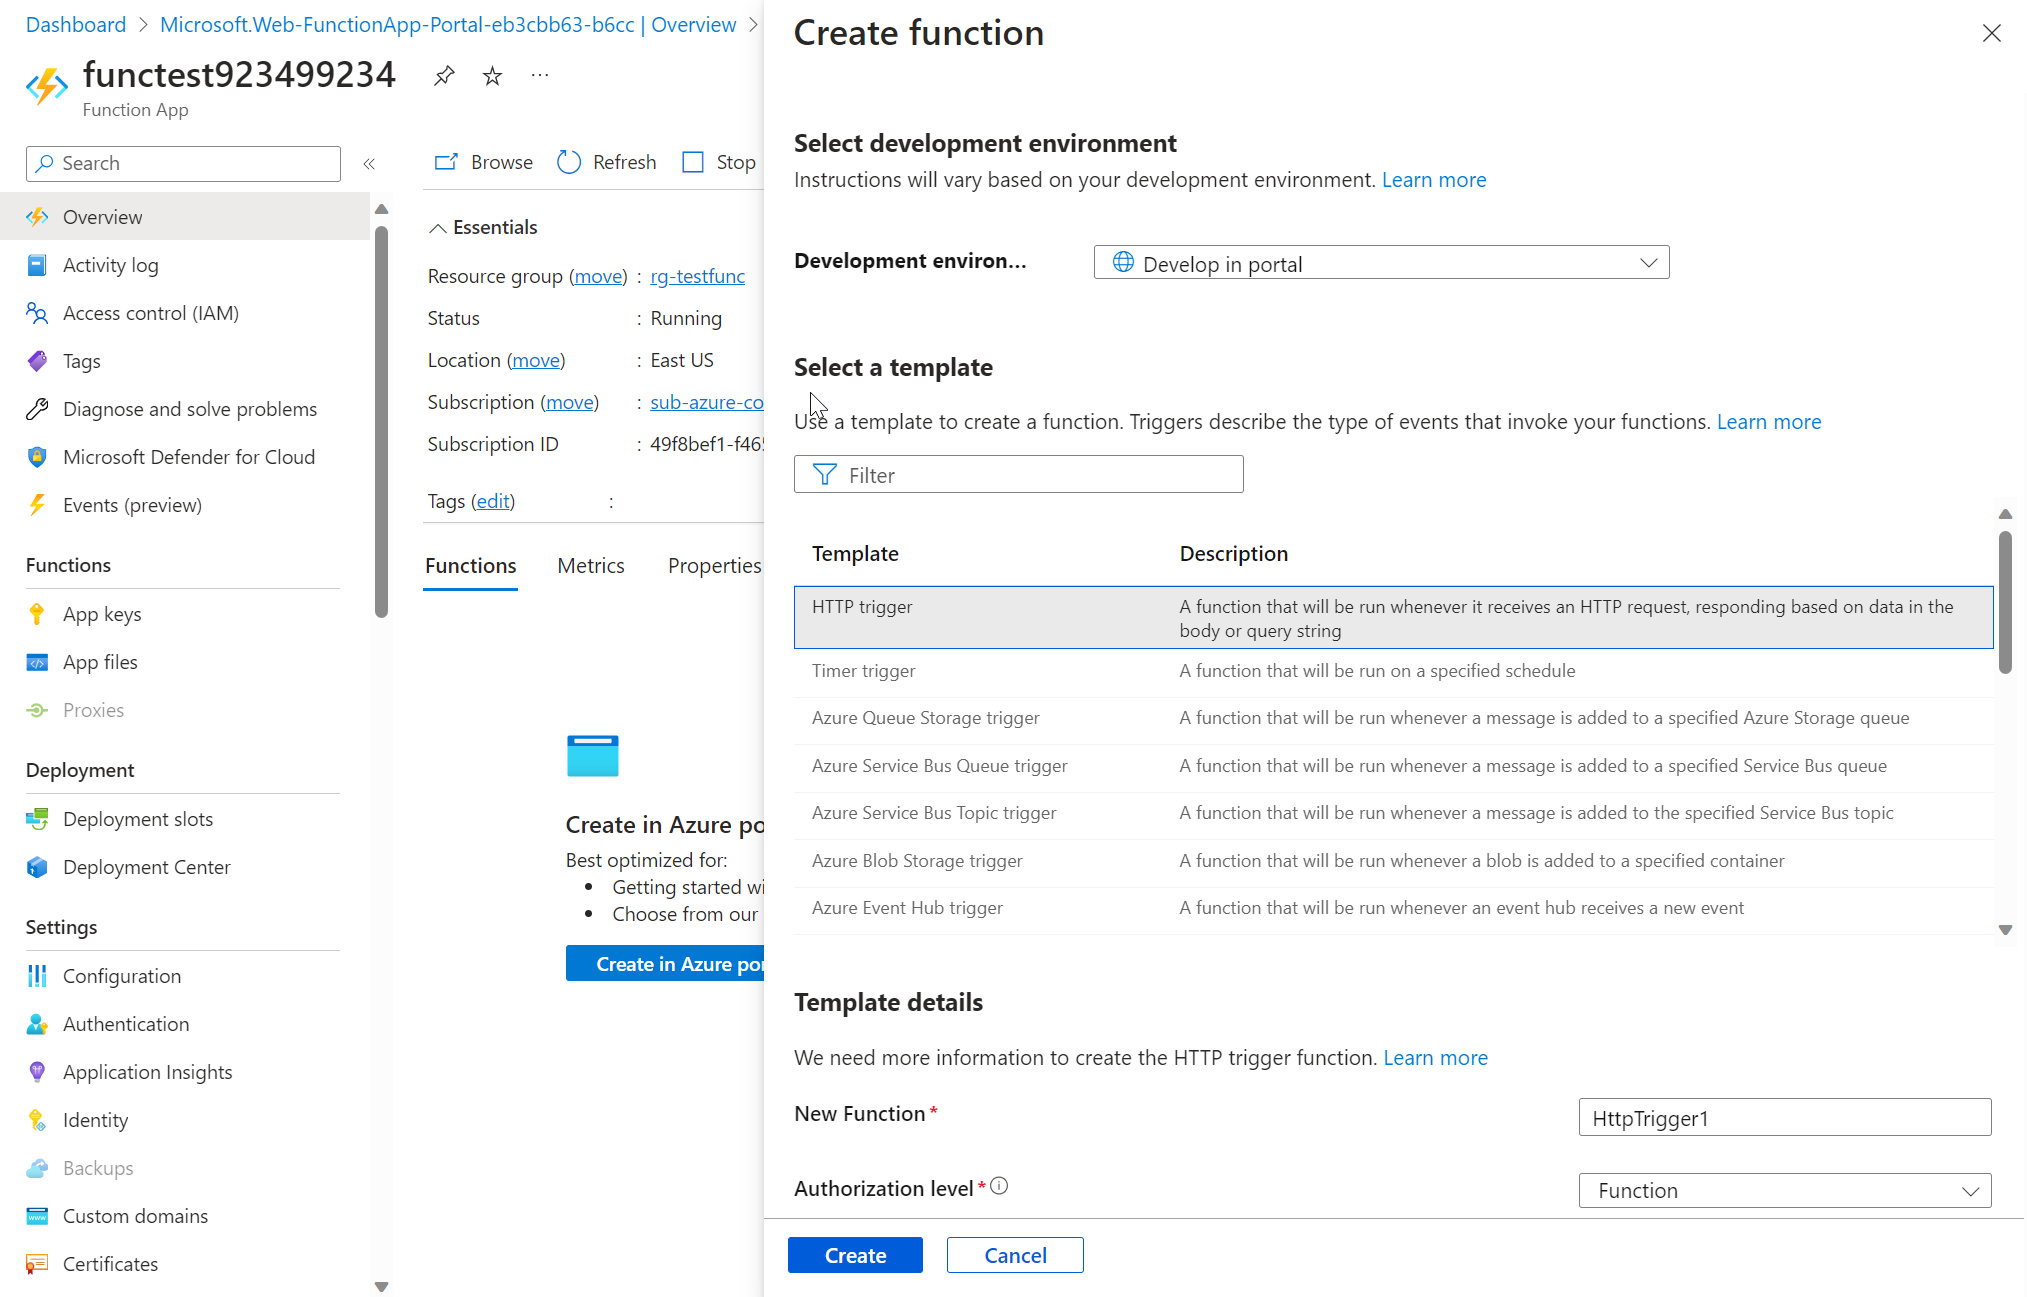
An pop-up window will appear on the right. In the Template section click HTTP trigger. Click Next and Create.
-
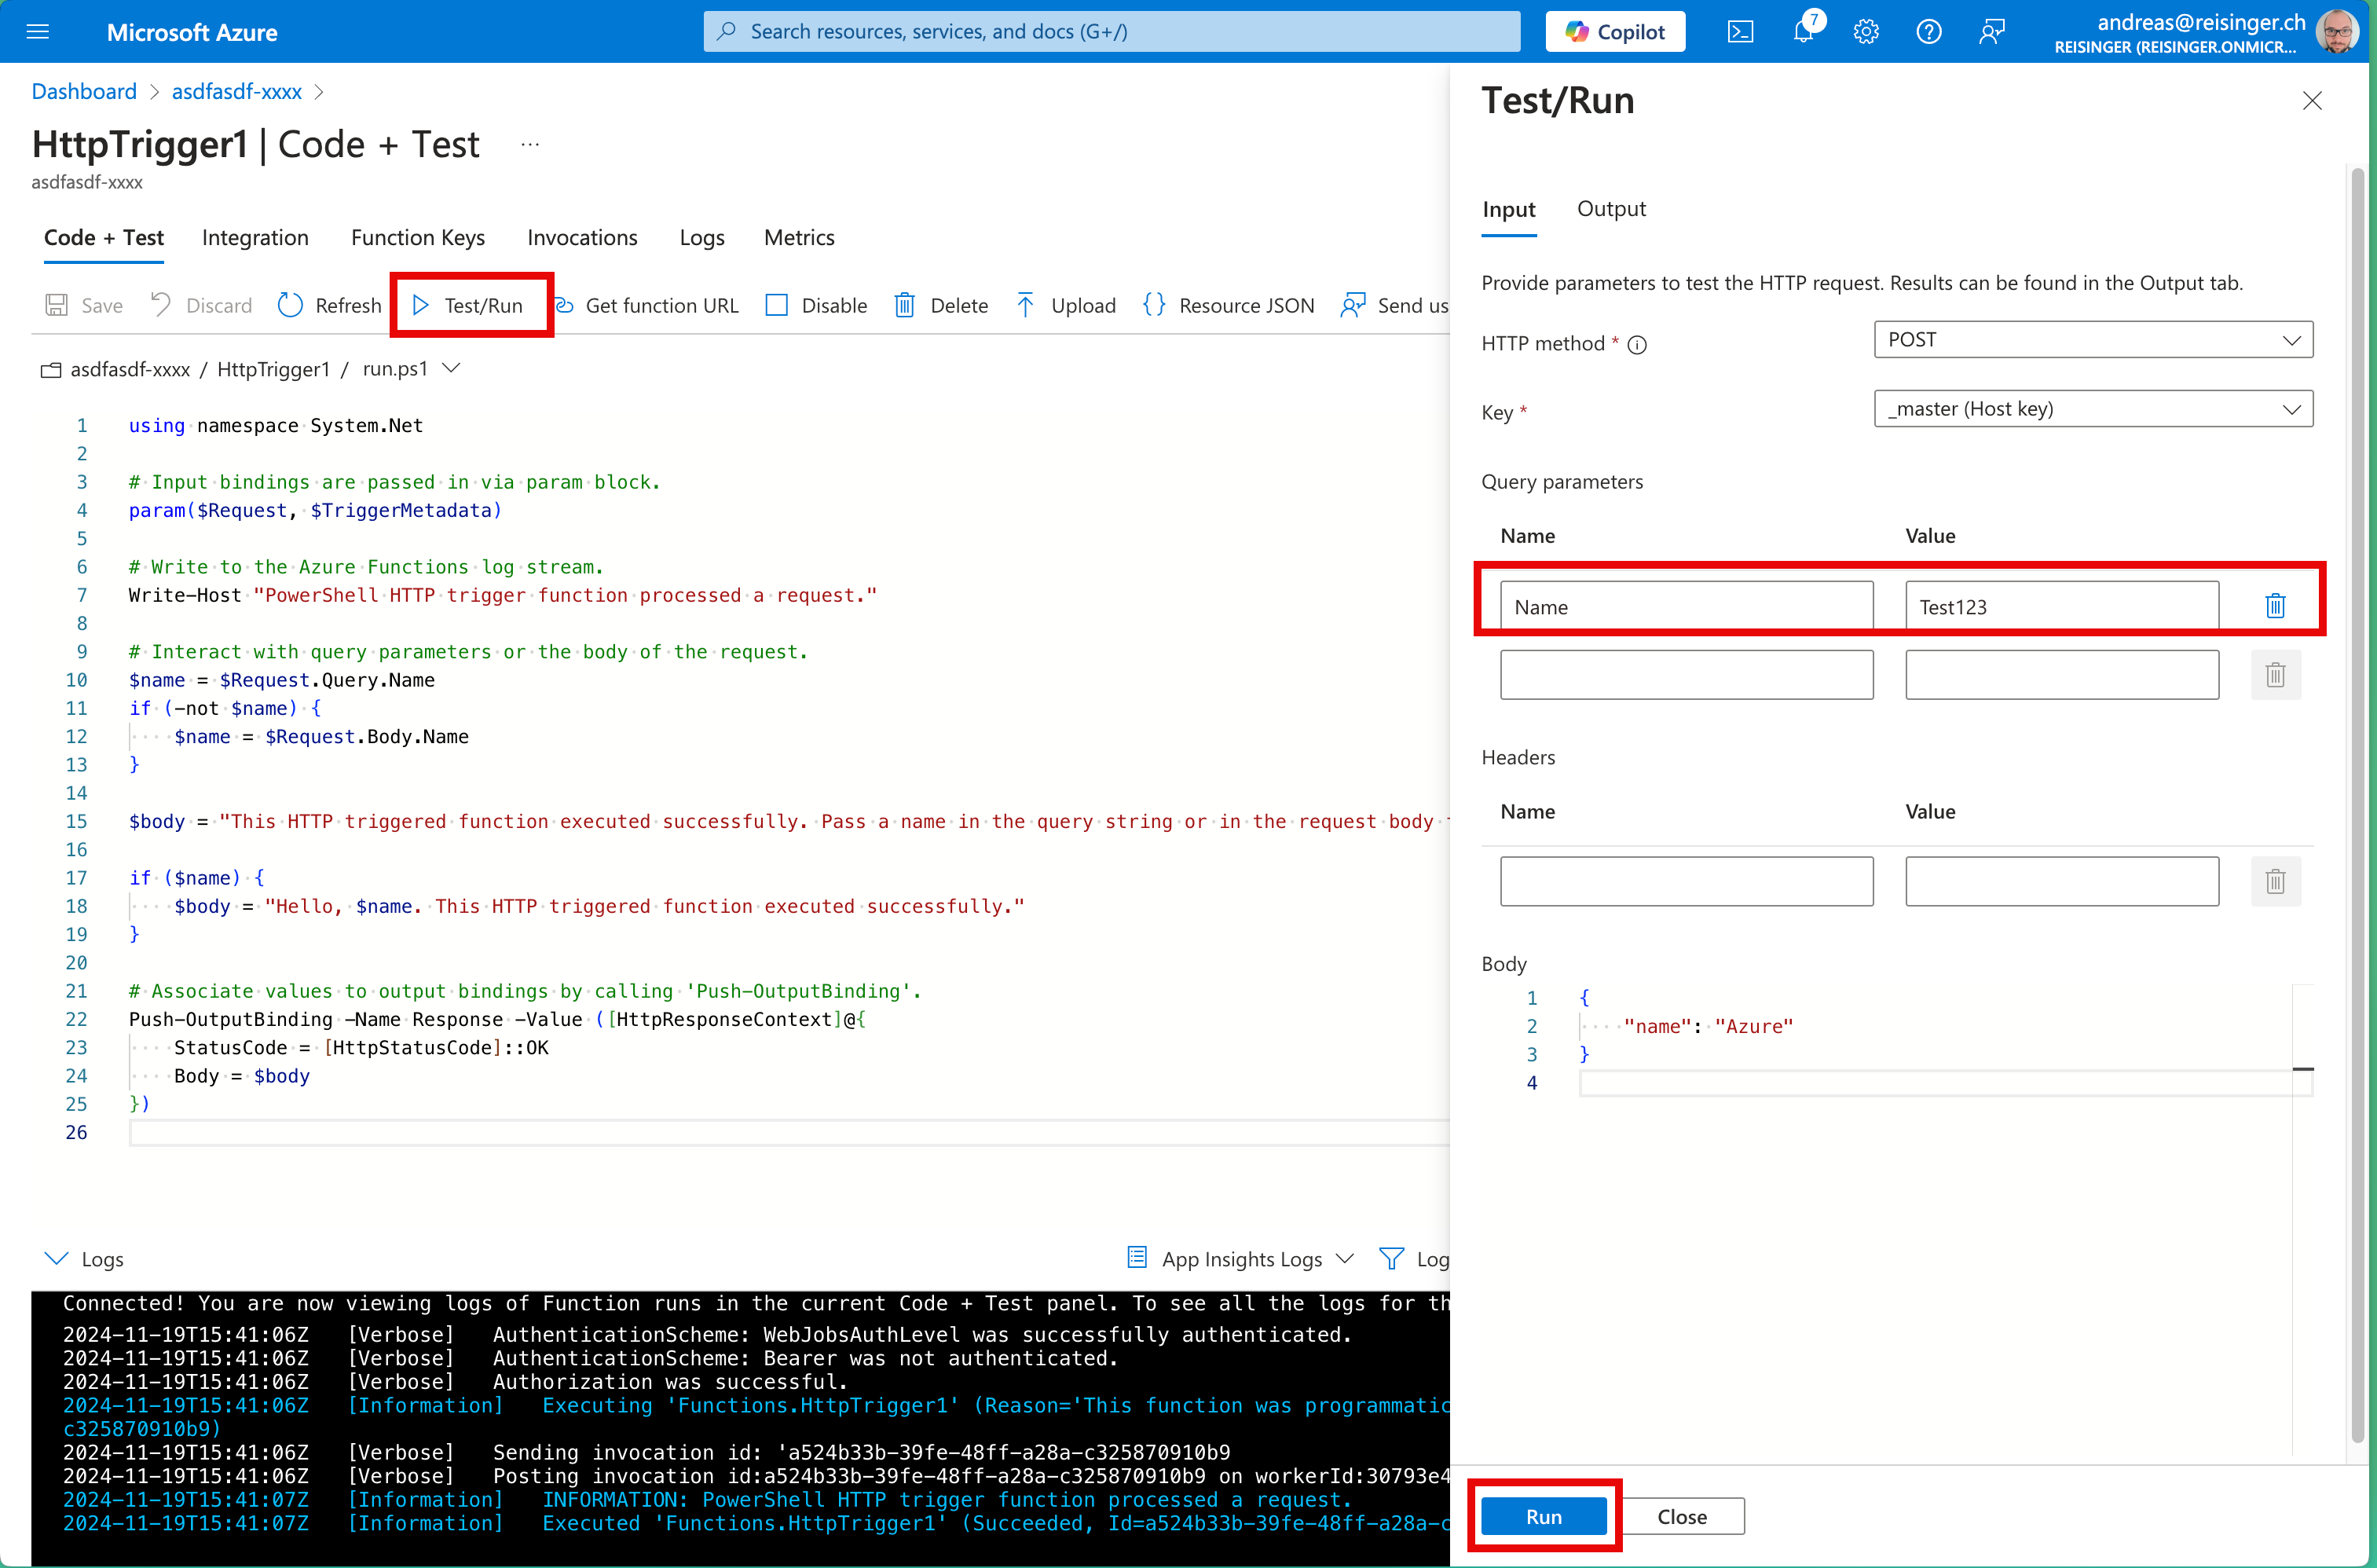
Test the function by clicking on Test/Run. Define a name with the corresponding value and click on Run. A message should then appear, e.g. Hello, Test123. This HTTP triggered function executed successfully..
-
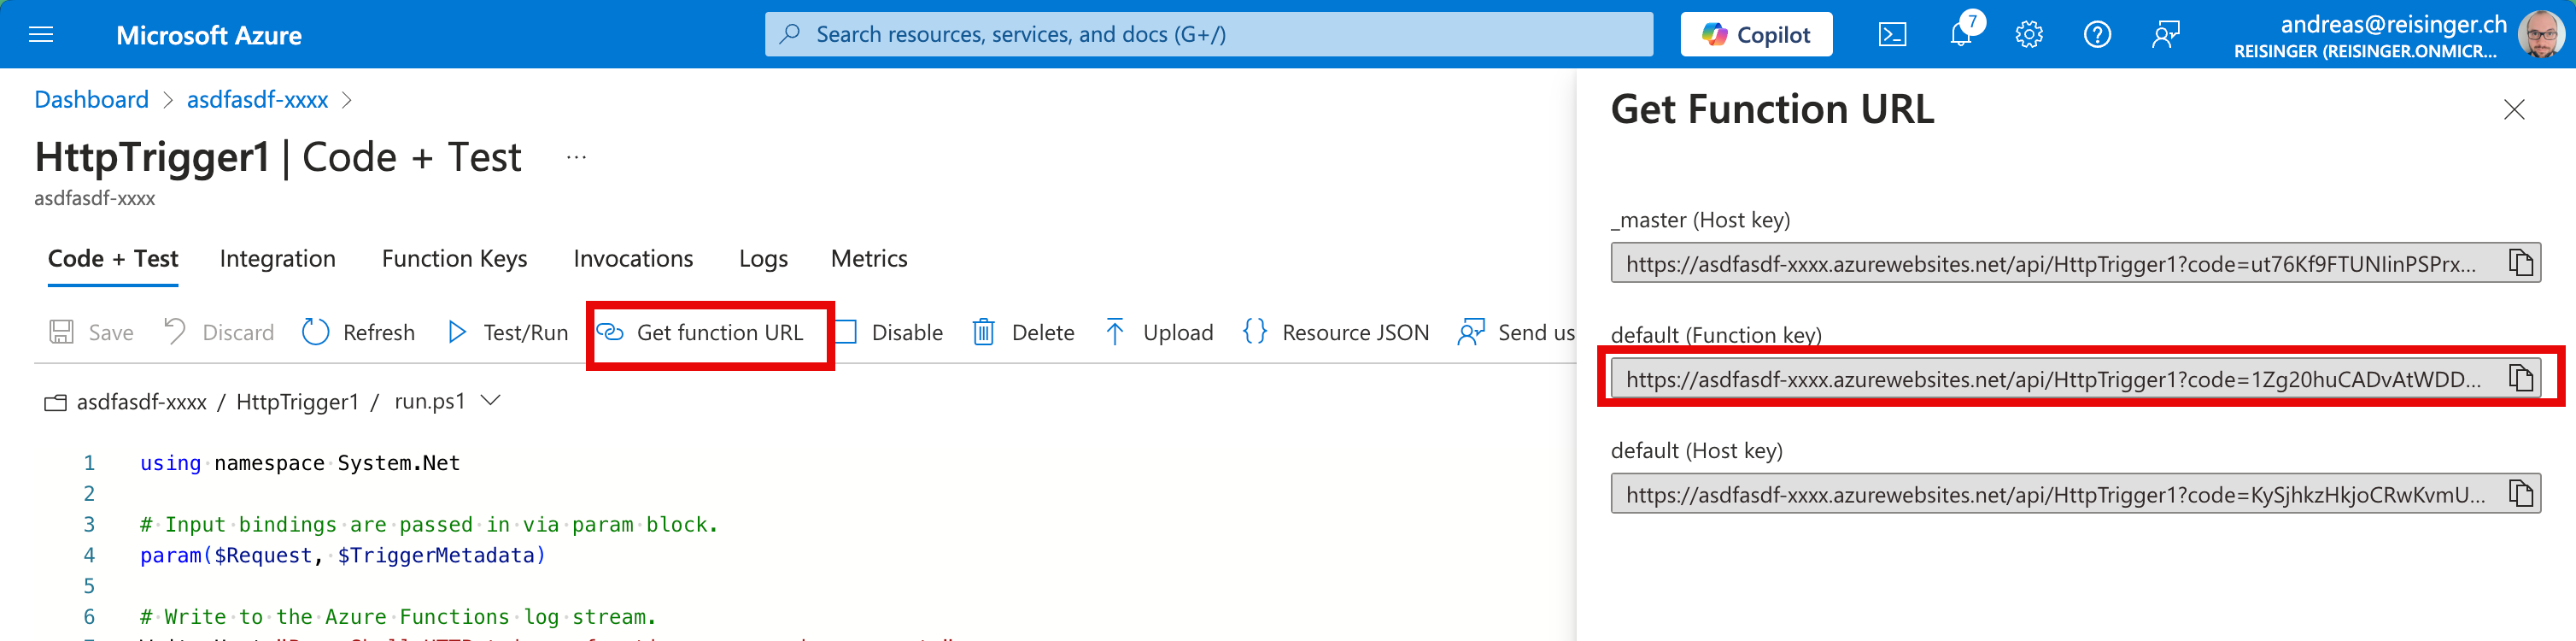
Click Get function URL from the top section of function editor and ensure to Copy the default (Function Key) value
-
Open a new browser tab and paste the copied function URL into your web browser’s address bar. When the page is requested the function will run. Notice the returned message stating that the function requires a name in the request body.

-
Append &name=yourname to the end of the URL.
Note: For example, if your name is Cindy, the final URL will resemble the following:
https://azfuncxxx.azurewebsites.net/api/HttpTrigger1?code=X9xx9999xXXXXX9x9xxxXX==&name=cindy
-
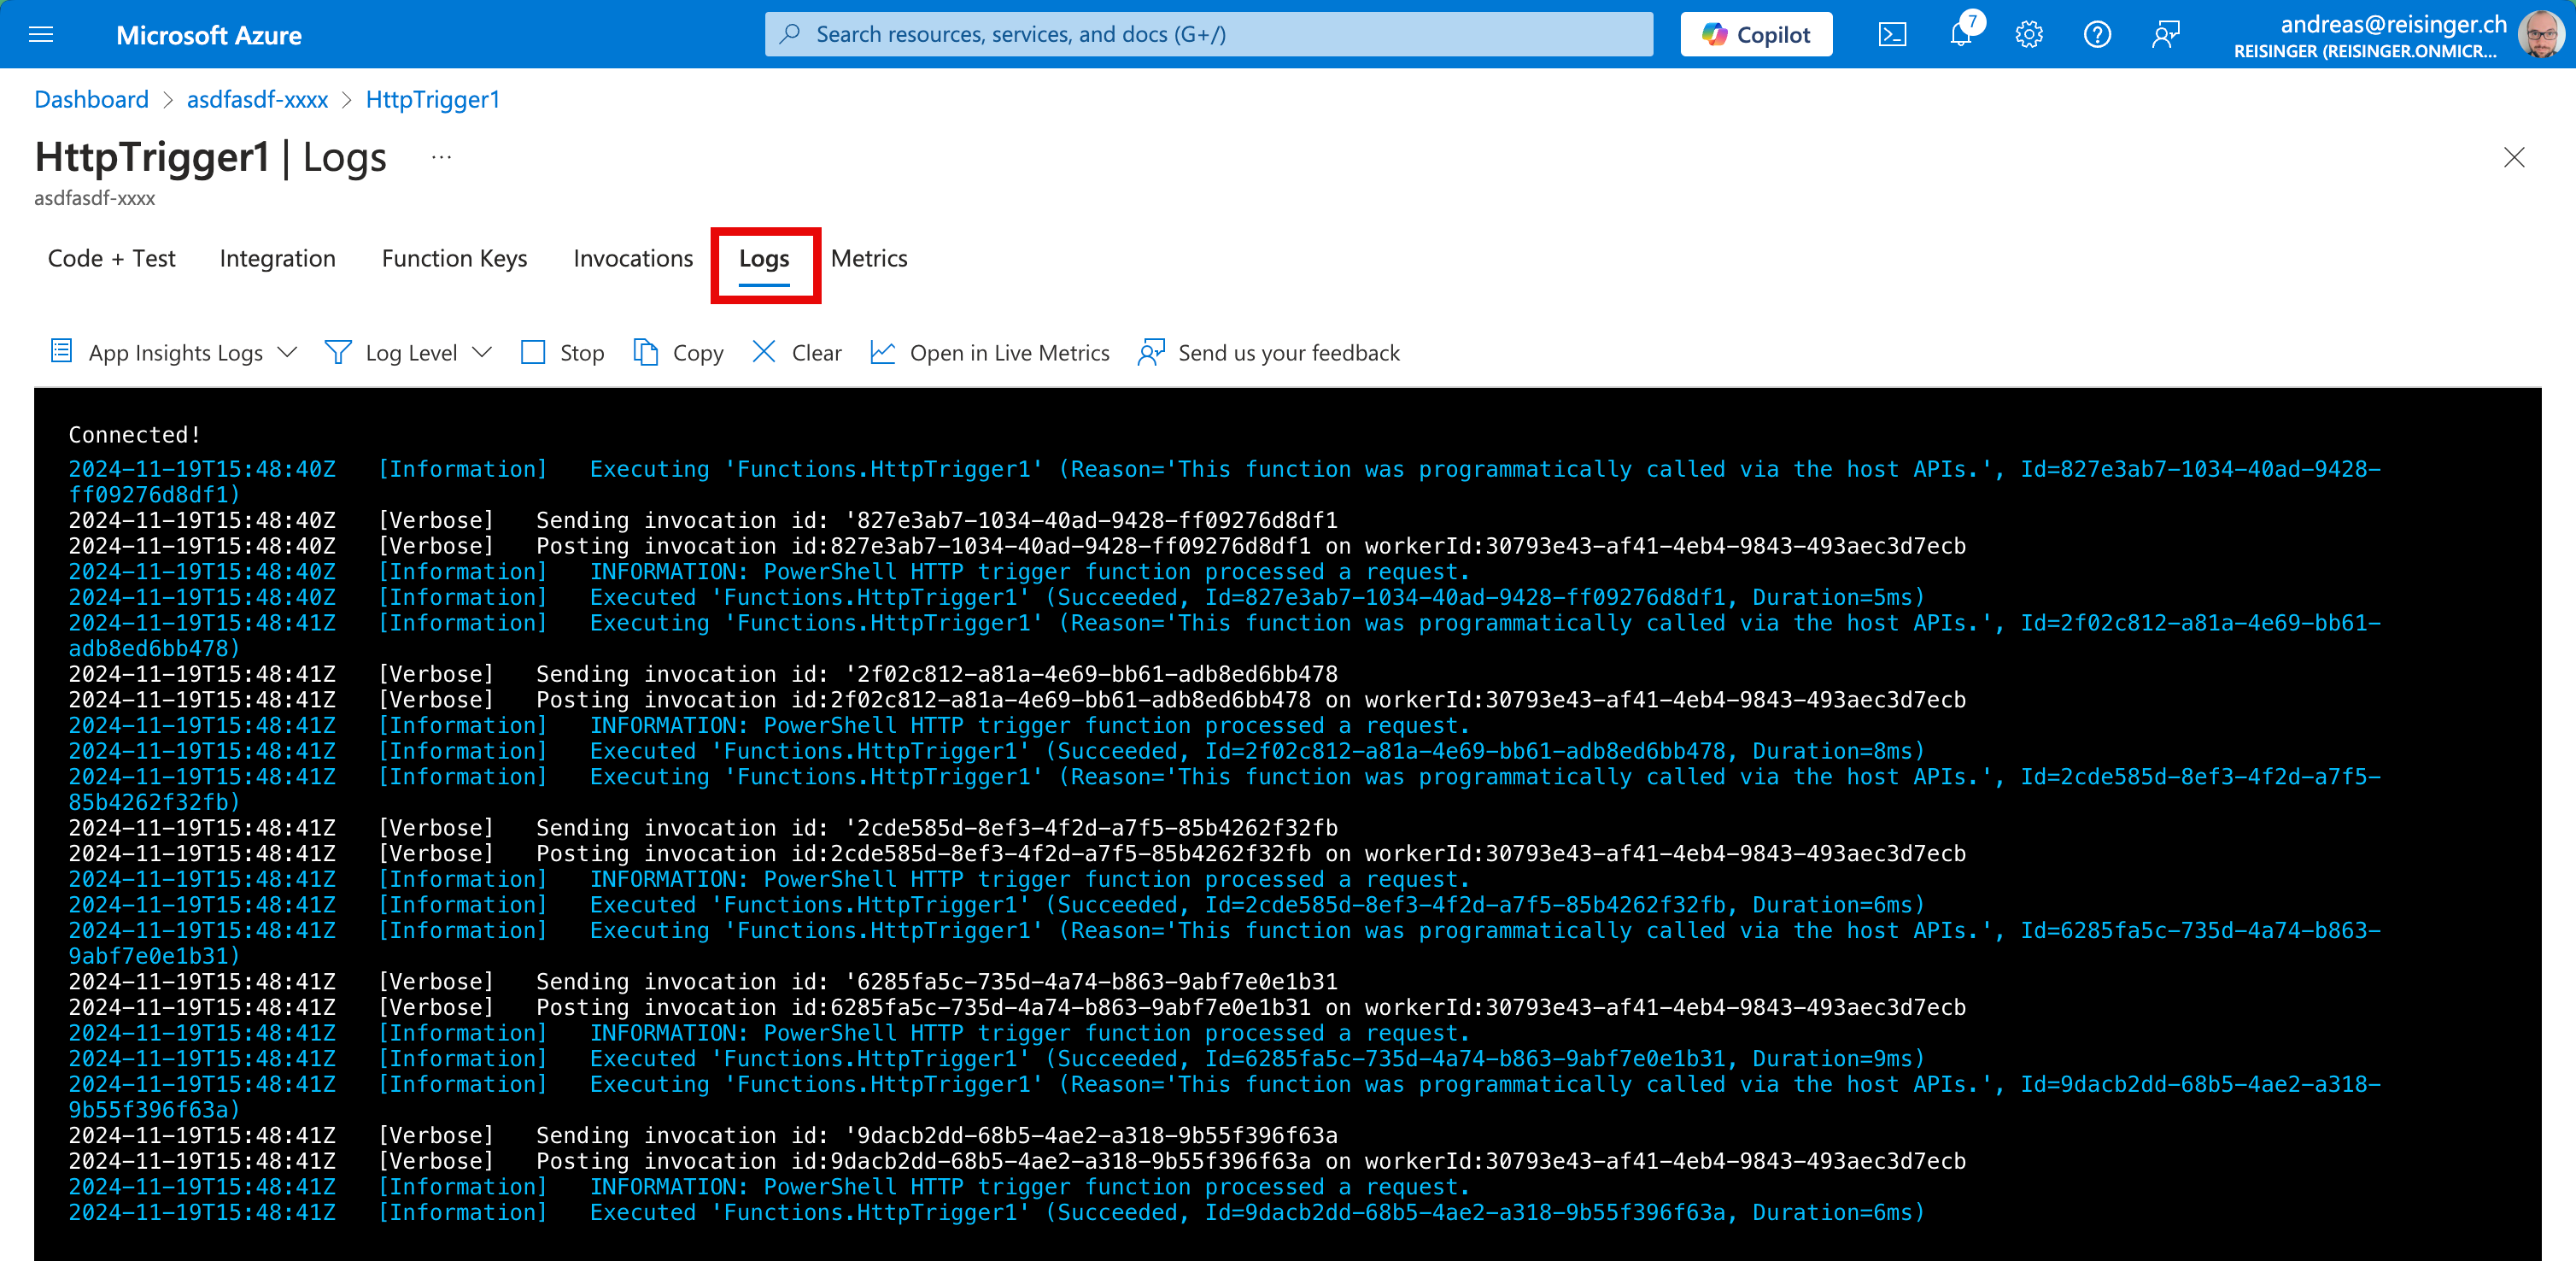
When you hit enter, your function runs and every invocation is traced. To view the traces, return to the Portal HttpTrigger1 | Code + Test and click Logs. You can open the Logs tab to get a live view. Open again the same URL as before. Now you should see an entry in the console. .
Congratulations! You have created a Function App to display a Hello message when there is an HTTP request.
Note: To avoid additional costs, you can optionally remove this resource group. Search for resource groups, click your resource group, and then click Delete resource group. Verify the name of the resource group and then click Delete. Monitor the Notifications to see how the delete is proceeding.