09 - Create a VM with the CLI (10 min)
In this walk-through, we will configure the Cloud Shell, use Azure CLI to create a resource group and virtual machine, and review Azure Advisor recommendations.
Task 1: Configure the Cloud Shell
In this task, we will configure Cloud Shell, then use Azure CLI to create a resource group and a virtual machine.
-
Sign in to the Azure portal.
-
From the Azure portal, open the Azure Cloud Shell by clicking on the icon in the top right of the Azure Portal.

-
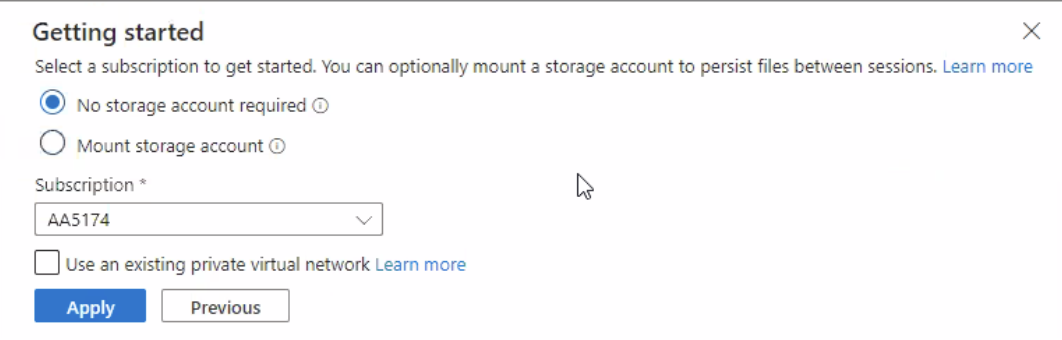
At Getting Started select no storage account required and click on Apply
-
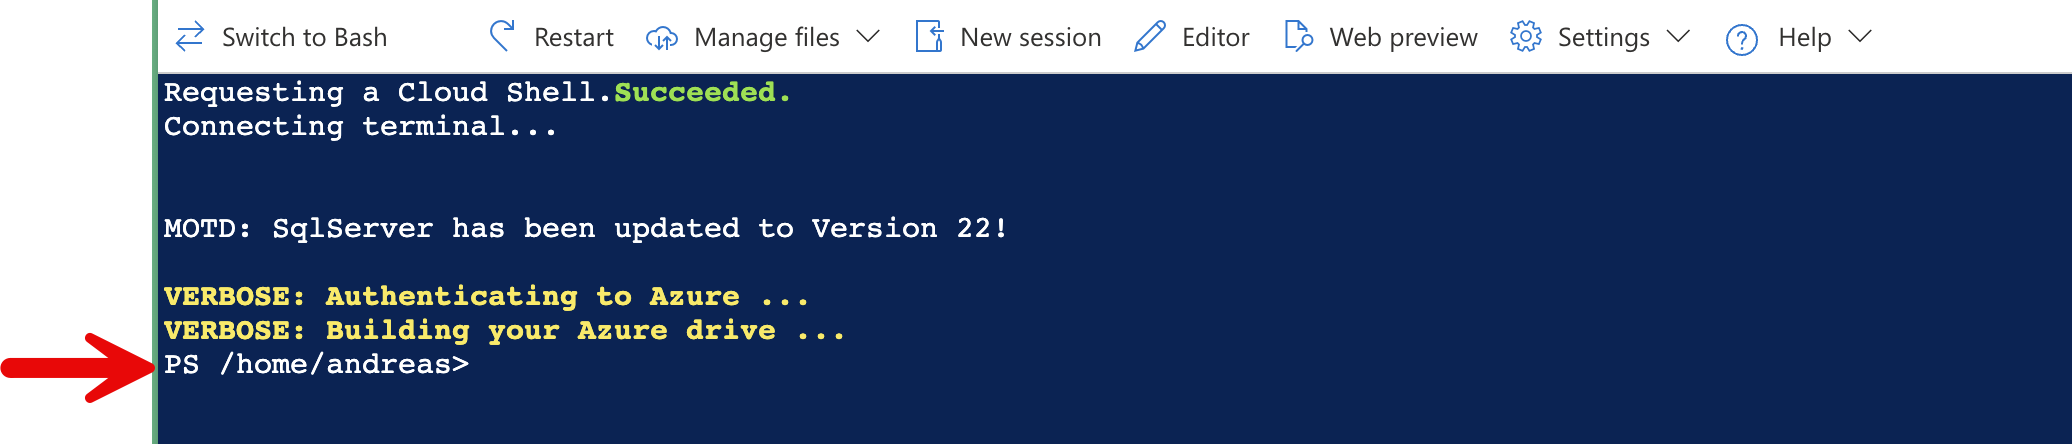
Verify that Bash is active. If Bash is currently active, click on Switch to Bash.
Task 2: Use CLI to create a virtual machine
In this task, we will use Azure CLI to create a resource group and a virtual machine.
Note: Open a notepad on the virtual machine and copy the Powershell/Bash commands into it first. From the notepad it can then be pasted into the browser by right clicking “copy” and “paste as plain text”.
-
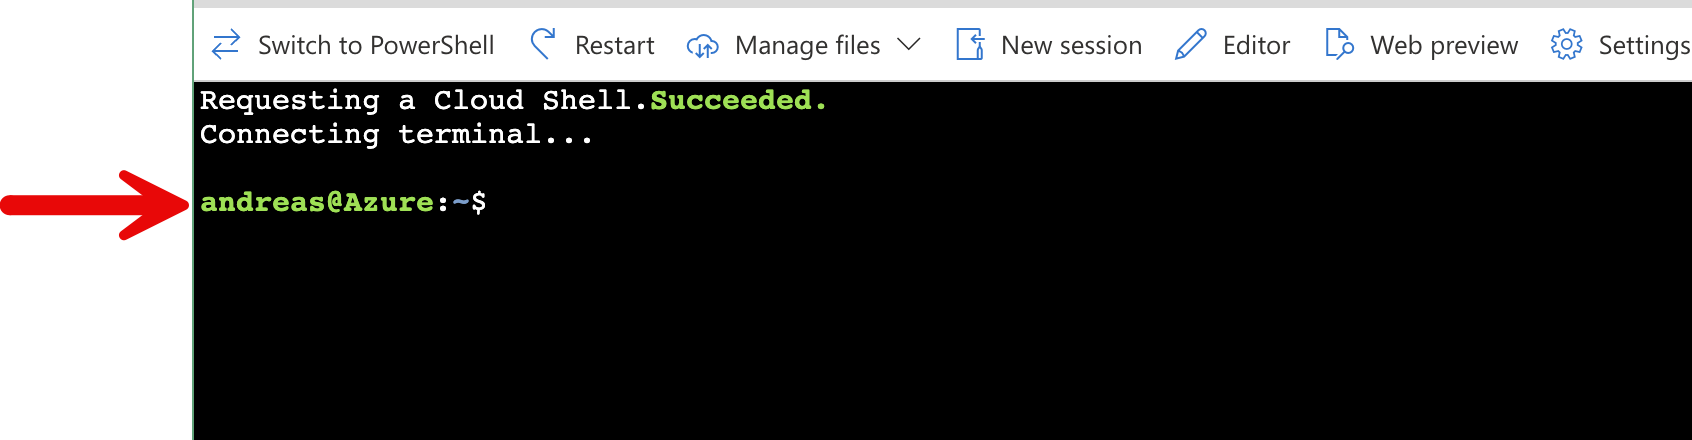
Verify that Bash is active. If Powershell is currently active, click on Switch to Bash.
-
Verify the resource group you are using by entering the following command.
az group list --output table - In Cloud Shell enter the command below to create a resource group.
az group create --location eastUs2 --resource-group 09-vm-cli -
In Cloud Shell enter the command below and make sure that each line, except for the last one, is followed by the backslash (
\) character. If you type the whole command on the same line, do not use any backslash characters.az vm create \ --name myVMCLI \ --resource-group 09-vm-cli \ --image ubuntu2204 \ --location EastUS2 \ --admin-username azureuser \ --admin-password Pa$$w0rd1234Note: If you are using the command line on a Windows computer, replace the backslash (
\) character with the caret (^) character.Note: If an error message appears that the resource group does not exist, execute the following command first:
az group create –location eastUs2 –resource-group 09-vm-cliNote: The command will take 2 to 3 minutes to complete. The command will create a virtual machine and various resources associated with it such as storage, networking and security resources. Do not continue to the next step until the virtual machine deployment is complete.
-
When the command finishes running, in the browser window, close the Cloud Shell pane.
-
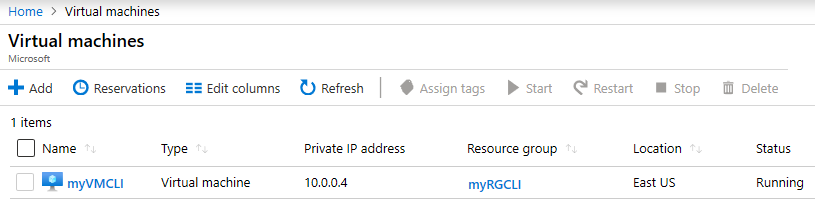
In the Azure portal, search for Virtual machines and verify that myVMCLI is running.
Task 3: Execute commands in the Cloud Shell
In this task, we will practice executing CLI commands from the Cloud Shell.
-
From the Azure portal, open the Azure Cloud Shell by clicking on the icon in the top right of the Azure Portal.
-
Ensure Bash is selected in the upper-left drop-down menu of the Cloud Shell pane.
-
Retrieve information about the virtual machine you provisioned, including name, resource group, location, and status. Notice the PowerState is running.
az vm show --resource-group 09-vm-cli --name myVMCLI --show-details --output table -
Stop the virtual machine. Notice the message that billing continues until the virtual machine is deallocated.
az vm stop --resource-group 09-vm-cli --name myVMCLI -
Verify your virtual machine status. The PowerState should now be stopped.
az vm show --resource-group 09-vm-cli --name myVMCLI --show-details --output table
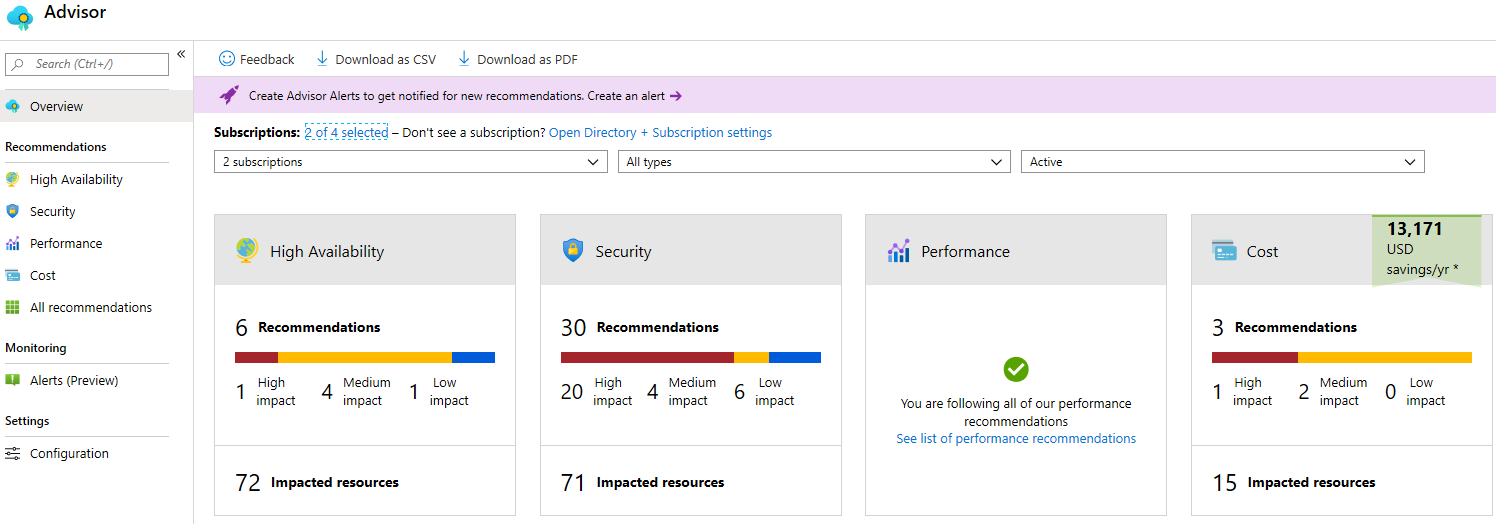
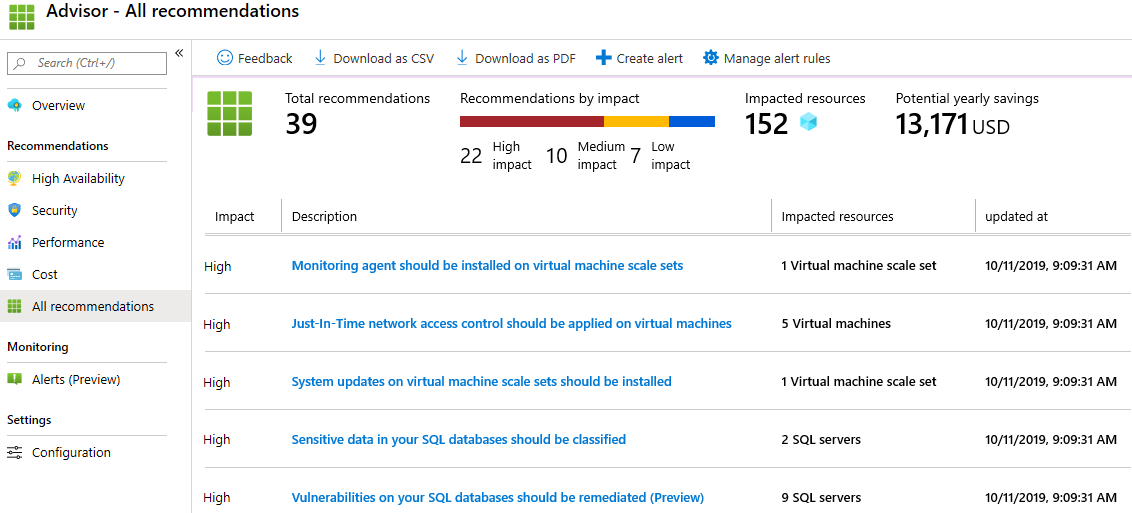
Task 4: Review Azure Advisor Recommendations
In this task, we will review Azure Advisor recommendations.
Note: If you have completed the previous lab (Create a VM with PowerShell), then you have already performed this task.
-
From the All services blade, search for and select Advisor.
-
On the Advisor blade, select Overview. Notice recommendations are grouped by Reliability, Security, Performance, and Cost.
-
Select All recommendations and take time to view each recommendation and suggested actions.
Note: Depending on your resources, your recommendations will be different.
-
Notice that you can download the recommendations as a CSV or PDF file.
-
Notice that you can create alerts.
-
If you have time, continue to experiment with Azure CLI.
Congratulations! You have configured Cloud Shell, created a virtual machine using Azure CLI, practiced with Azure CLI commands, and viewed Advisor recommendations.
Note: To avoid additional costs, you can optionally remove this resource group. Search for resource groups, click your resource group, and then click Delete resource group. Verify the name of the resource group and then click Delete. Monitor the Notifications to see how the delete is proceeding.